Data Entry – Excusing Participants– Create New Invite – Sample Invite
View Sped Manual entry on Meeting Invites
Entry for Meeting Invitations
There are six possible entries for meeting invitations. Each of the six is identical and should be used in order (1 through 6).
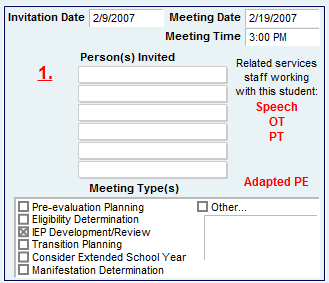
Invitation Date: This is the date the meeting invitation is sent. Two weeks notice must be given prior to the actual meeting date.
Meeting Date: This is the date the proposed meeting is scheduled to be held.
Meeting Time: This is time the meeting will take place. Be advised that a time entered without a “PM” or “AM” will default to AM.
Person(s) Invited: Individuals that are invited to the meeting need to be listed by position only (not by name). The invitee position is a pop up menu of various team members that may be invited to the meeting, including the following choices:
Administrator – SpEd Teacher – GenEd Teacher – Parent – Student – School Psychologist – SLP – OT – PT
Social Worker – Counselor – District Rep. – Instructional Aide – Hearing Specialist – Vision Specialist – Child Find Coordinator – Transition Agency – Other…
On the data entry screen you will be able to see any areas of related service that the student is receiving services in. These alerts come directly from the student’s summary of services. If a related service is listed here, that service provider should be invited to participate in the meeting. This information does not print on the meeting invitation, it is simply an alert to the case manager to remind them to include these service providers when planning for an IEP meeting.
The meeting invitation allows for six different people to be entered on the form. If you are inviting more than six people, you must do two invitations. The invitations include a position only (rather than a name field). This helps to avoid unnecessary excusals when a particular person is not able to attend the meeting, but another team member can adequately fill that role (e.g., the vice principal attends s the district representative in place of the principal).
Meeting Type: Check all appropriate boxes relevant to the type of meeting to be held. More than one box may apply to any particular meeting.
Once the invitation is complete, you will have the option to print any of the 6 possible Meeting Invitation from the Print menu. The date of the scheduled meeting will appear on the print menu as a reference to help you choose the correct meeting invitation.
Excusing Participants
Person(s) excused with Parent Permission: (printed version only)
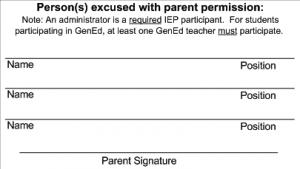
This box appears only on the printed version of the Meeting Invite. This area needs to be filled in when there are individuals who have been included on the meeting invite, but they were not able to attend the meeting.
Creating a Blank Meeting Invitation:
When all Meeting Invitations have been used, use the button:![]() . This button deletes Meeting Invitation 1 which then in turn moves the contents of Meeting Invitation 2 to Meeting Invitation 1, 3 to 2, 4 to 3 and so on leaving Meeting invitation 6 blank.
. This button deletes Meeting Invitation 1 which then in turn moves the contents of Meeting Invitation 2 to Meeting Invitation 1, 3 to 2, 4 to 3 and so on leaving Meeting invitation 6 blank.
The printed form of the meeting invitation has additional space to document phone contacts regarding the meeting invitation.

Also include in the printed invitation is information about who the case manager is and their phone number. If this information is incorrect, contact District Office to make any necessary changes.
![]()
Once the meeting Invitation is printed it MUST be signed by the case manager, and the original, signed copy must be sent to Darla or Rebecca at District Office as well as copies to all invitees. The copy that is sent to District Office must include documentation showing how/when the parents were contacted (or an attempt made) to confirm the meeting.
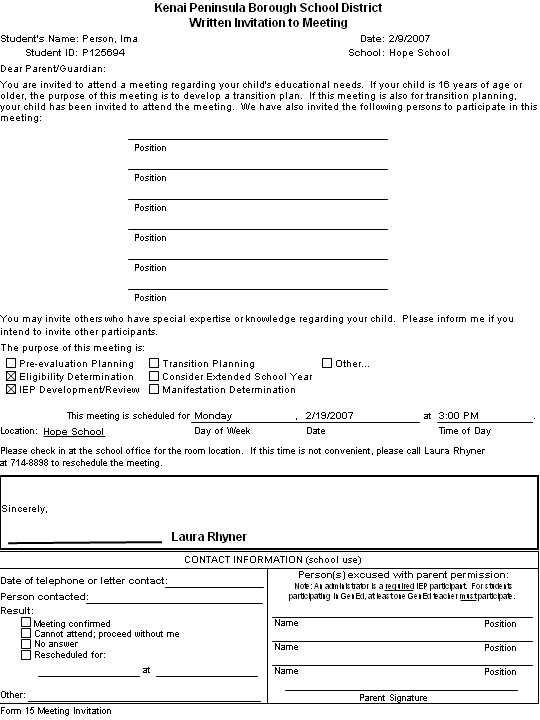
Sample Invitation
The printed version of the Meeting Invite will look like this: